
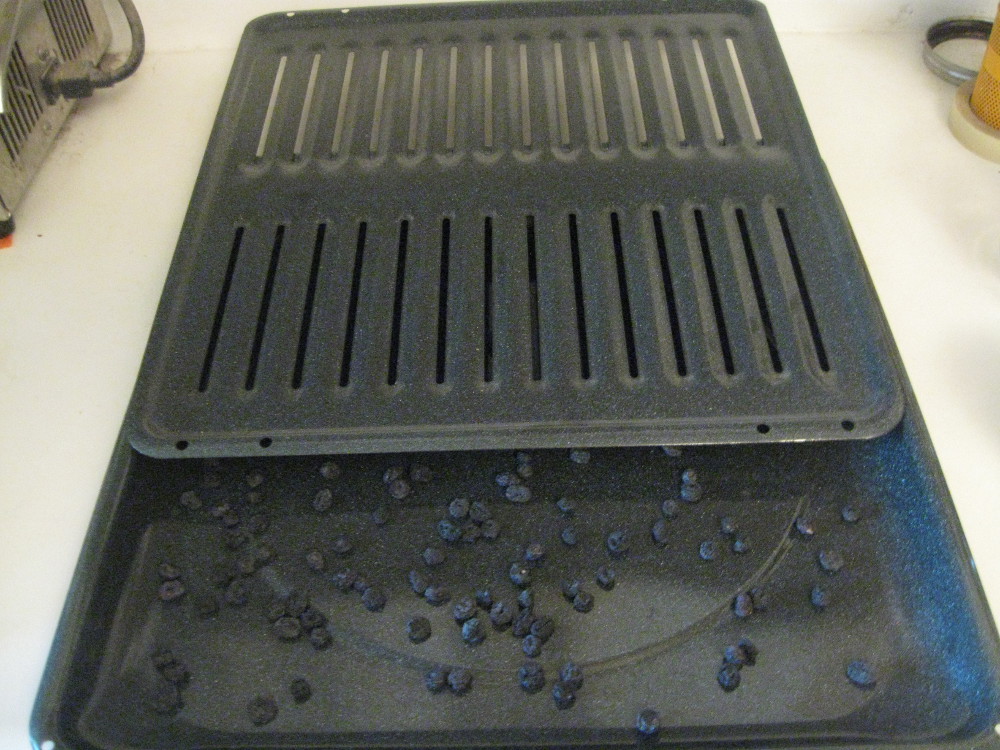
A broiling pan with dried blueberries.
Have you ever thought about drying your own fruits and vegetables but been put off by the need to acquire a dehydrator? Well, it turns out that you don’t need any fancy equipment to dry food. You probably have what you need in your kitchen already. It takes some time and attention, but the results can be quite good.
It’s a little late in the season now (in September) for sun drying things, but that is one easy way. I like to dry cherries in July, blueberries in July and August, and various other small fruits sometimes. July and August are the very best times for sun drying because the sun is at its most powerful, and there are usually a lot of hot, sunny days in Chicago. In September, there is still enough sun to dry herbs, and I like spring and fall best for that because it’s harder to burn the delicate leaves.
I’ve learned (the hard way!) that if you are drying fruit or anything that might be tasty to insects and birds outdoors, it has to be covered. Otherwise, you’re just setting out a feast for the critters. (It’s also good to cover herbs to keep them from blowing away.) I use a couple of old broiling pans–the kind that probably came with your oven–and put my berries or fruit in the bottom of the pan. The top has vents to let air in and out, and the pans are usually a dark color, which heats up the air inside it. Juicy fruits set out in the sun all day usually dry in about three days.
It’s important to bring in your dehydrating at night. Otherwise, it is likely to collect condensation, which is really counterproductive. So, at night (and on cloudy days), I bring in the pans, put them in the oven, and turn the oven light on. That heats up the oven to a nice, warm temperature. It isn’t hot enough to cook the food, but it’s just warm enough to dry it slowly.
In fact, if drying food outdoors isn’t an option for you, you can just put it in the oven (covered or on flat pans or trays) and turn the oven light on. It does take longer than sun drying, but it is about as effective. If you want a little more heat and want to spend a little money on the project, you can buy a lamp cord with a socket at the hardware store and put an incandescent bulb in it (another oven bulb, if you can’t find another kind) and put that in the oven. That will probably be too hot some of the time, so it’s important to monitor the temperature and turn off the second bulb if it gets over 140F or if it looks like the fruit is cooking. (Note: Fluorescent light bulbs and LED bulbs do not generate enough heat for this purpose. You need to use an old-fashioned incandescent, which gives off a lot of heat. These are only available now as specialty bulbs, such as oven bulbs.)
Here are a few caveats and technicalities: Ideal drying temperature for fruit is 140F. Hotter than that cooks the food, which isn’t the effect you’re after. It won’t really hurt it, but it changes the texture. A standard kitchen thermometer or oven thermometer is helpful for monitoring the temperature, but you can also just keep an eye on it to see how it is doing. If it starts looking cooked, reduce the temperature. Fruit will dry at lower temperatures, but more slowly. Below 100F it will usually mold before it dries, so aim for the higher temperatures.
It’s important to cut large, juicy fruits into smaller pieces. Pit cherries, slice strawberries, cut cherry tomatoes in half and remove the seeds. Place them juicy side up on the tray for the first day to give them the best possibility of drying.
It’s also important to have some higher heat for the first half-day to day of drying. If fruit doesn’t get a bit of a crust on it the first day, it is more apt to mold. But if the surface dries in the beginning of the process, then it will turn out edible. You can accomplish this by making sure your first day of sun drying is hot and sunny or by heating up the oven to the lowest temperature before you put the fruit in and then letting it cool to about 140F before you put your trays in the oven.
After a day or so, stir or turn whatever you are drying so that the surfaces that were touching the pan are exposed to the air. That will cause the drying to be more even. Also, the smaller pieces will dry first. You can remove them to a sealed container once they are dry.
So, how do you know when they are done? Think of the texture of a raisin. It isn’t rocky hard, but it doesn’t have much free moisture in it. It’s that indefinable, chewy in-between stage between wet and dry, sometimes called “leathery.” When your fruit reaches that consistency, it is ready to be stored. Put it in an air-tight container and store on a shelf. Dried fruits will last at least a year, sometimes longer.
Herbs are dried at lower temperatures. 80-90F is best for those. You can, of course, also hang up bunches of herbs for drying. I do find, however, that they dry more evenly when spread out on a tray. Watch them carefully to be sure they don’t burn. Then store them in an air-tight container. Herbs lose much of their savor after a year.
From some quick research, I believe it may be necessary to blanch some or all vegetables before drying them, but I haven’t really looked into it and haven’t tried any of them, myself. You might want to do some reading before going down that road.
This might be the year to try dehydrating. You can get creative and try all kinds of fruits and vegetables. I’d be curious to know what works for you. You can find more information on drying food at the National Center for Home Food Preservation.
I’ll be doing a Zoom workshop on food preservation for Wild Onion Market, my local food co-op start-up, on Tuesday, September 29 at 7:00 pm CDT. You’re invited to join in: https://us02web.zoom.us/j/89593190791.
Recent Comments